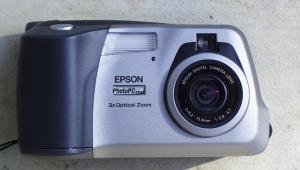
The camera body is compact; it's not shirt-pocket size, but it will fit into a large coat pocket. The camera also comes with a camera bag that has a belt loop; a very nice touch indeed.
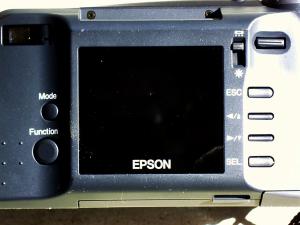
The camera back has a few well-marked controls. The Mode control lets you switch between normal, macro, digital zoom, and panorama modes. While viewing pictures, pressing the Function button and ESC lets you erase the picture you're currently viewing.
Above the ESC button is the "Solar Assist" slider. When you pull the slide down, a louver opens so that the LCD is backlit by the ambient sunlight. This feature is truly marvelous; not only does it save battery power, it also makes the LCD visible in direct sunlight.
The up-and-down arrow keys below ESC are placed correctly; the up arrow is above the down arrow. The SEL button is used to select choices when in the menus (see below). The buttons on my camera are quite stiff; I often think I have pressed them, but nothing happens, and I have to press the button harder. You can see some menu screenshots here.
The thin horizontal control at the upper right of the camera is the zoom. You push the control up to zoom in, and pull it down to zoom out. I think this is bad design, since normally you push things away from you and pull them towards you. The zoom control feels sluggish, and it has a lot of inertia; I have found it difficult to make small adjustments.
The optical viewfinder is at the top left of the camera, and the preview LCD (which gives a very crisp image that updates in real time) is in the middle.
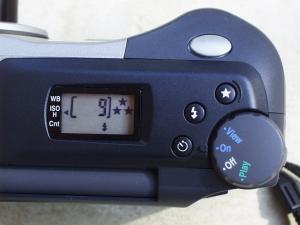
The top view here shows the display panel LCD and main control dial. The display panel LCD tells you the number of pictures remaining, the image quality, and the flash settings. There are three buttons to the left of the main dial. The "star" button lets you choose picture quality (more stars means less compression). You also can set monochrome mode with this button.
The "lightning bolt" lets you cycle flash mode between automatic, forced flash, and no flash.
The third button sets the ten second self-timer.
The control dial is a classic example of bad user interface design. Here's what the settings mean:
- Play - play back pictures that have already been taken
- Off - camera power is off.
- On - camera can take pictures; LCD screen does not show a preview
- View - camera can take pictures; LCD screen shows live preview
If you are in View mode, you see the picture frozen on the LCD while it's being stored on the compact flash card. After it's stored, if you want to take a longer look, you have to switch to Play -- and go through the Off position. This forces the lens to retract, which takes about 1.5 seconds. After you have decided whether you want to save the picture or not, you then go back to View mode, and the lens has to extend again, wasting more time. All your exposure and quality settings are retained, but your zoom position has been lost.
Epson, are you listening?! If the firmware is upgradable, then there is an easy solution. Make this change: when you hold down the Function button and press the SEL button, you will switch from Play to View and vice versa, without having to turn the camera to Off.